

This is the fourth in a series of posts discussing how to set up and run a WordPress blog from a relatively experienced expert, which will feature many helpful and hopefully relevant tangents.
In the first article I discussed the first few steps involving sign-up, the difference between WordPress.com and WordPress.org, and your social media presence.
Then I looked at writing your first post using the WordPress content management system (CMS) and I also offered some general writing tips for new bloggers.
Last week I delved into the dashboard and the diverse world of widgets.
This week things get really interesting, as I’ll be looking at customising your existing template, either by using the free options available or with the Custom Designs upgrade.
Customisation
Here’s how my current blog homepage looks. (I can’t emphasise enough how this is just an example of a blog. This isn’t my own genuine blog… Unless of course I start getting some traffic, then I may have a serious rethink).

Such wow and many swish I think you’ll agree.Â
It could be so much better though.
Free-to-use options
Head into your dashboard, scroll down the side-menu on the left and click on ‘Appearance’, then ‘Customise’.
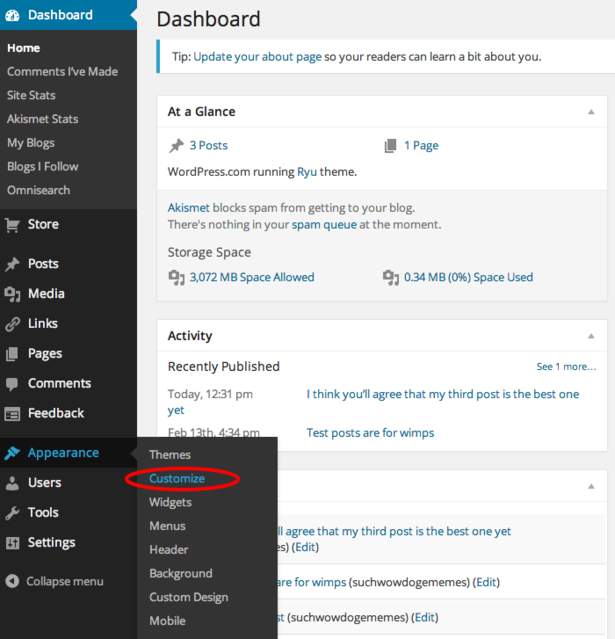
This will take you directly to your homepage, opening up a new right-hand menu full of various options for customising your existing template.
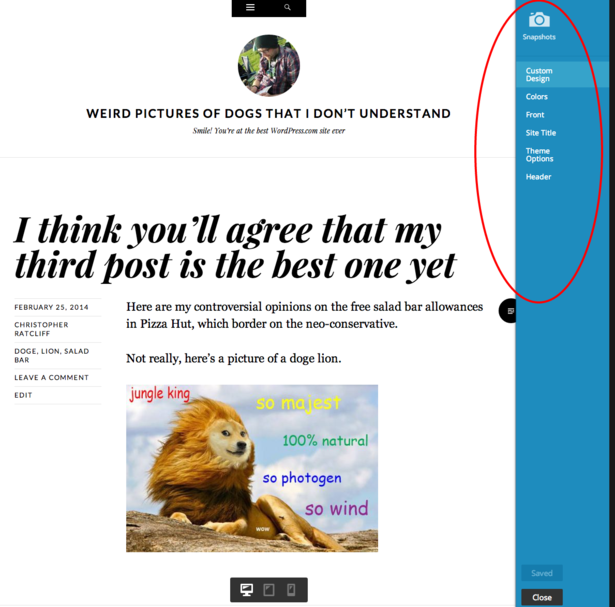
These are the options available as a free user of WordPress.com.
Colours and images
In ‘Colours’ you can change the background colour, or upload your own image for the background which can be tiled or positioned accordingly.

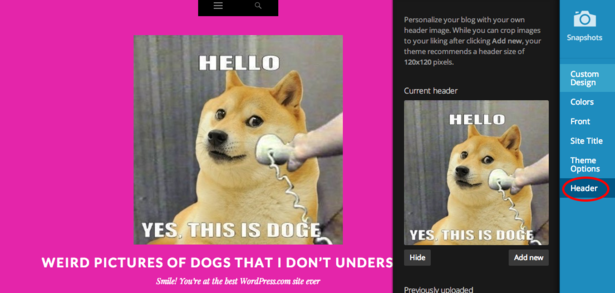
If you’re tired of looking at your own profile image in the header of your homepage, head to ‘Header’ and you can drag in any image you like.
I’m just getting better and better at this.Â
Homepage and about page
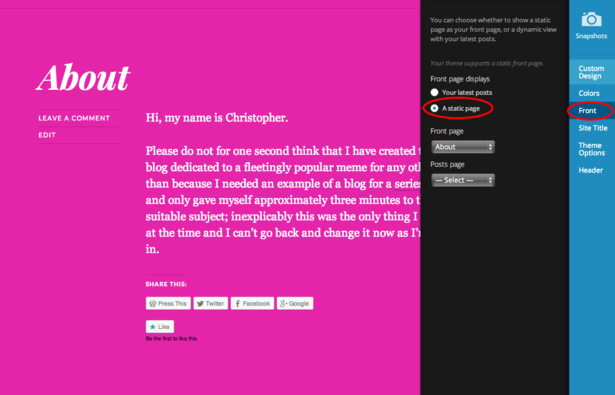
You can also change the homepage from a scrolling page featuring your latest blog posts to a static page of your own creation. Here the default is your ‘about’ page.
If you’re not happy with your ‘about’ page, I wouldn’t recommend clicking the ‘edit’ button while in the customisation mode though, as this seems to make WordPress crash.
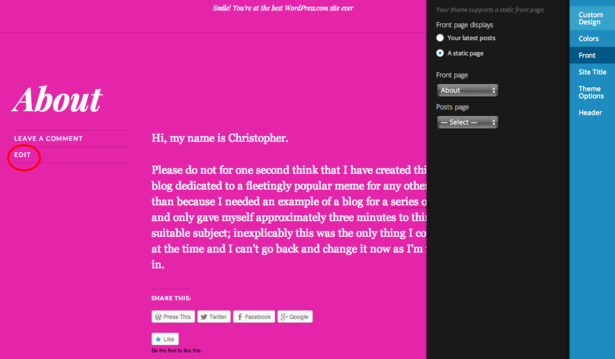
Instead just save your changes (save is in the bottom right corner) and head into your dashboard to edit your existing ‘about’ page.
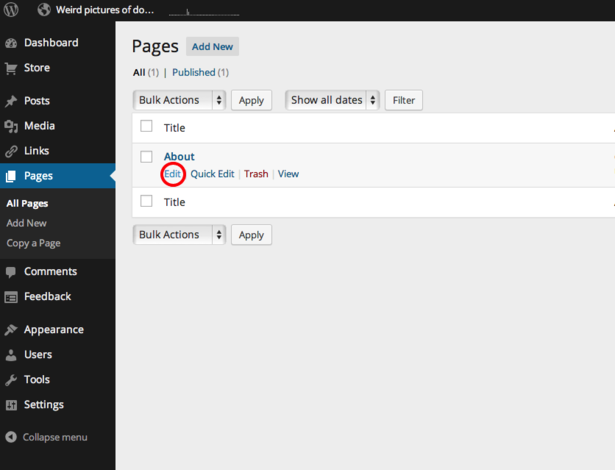
Here it is: DashboardPagesAll Pages. Then you can edit the page accordingly, including its title.
Title and tagline
You can also change the site title and tagline from the customisation menu, under the ‘Site Title’ tab.
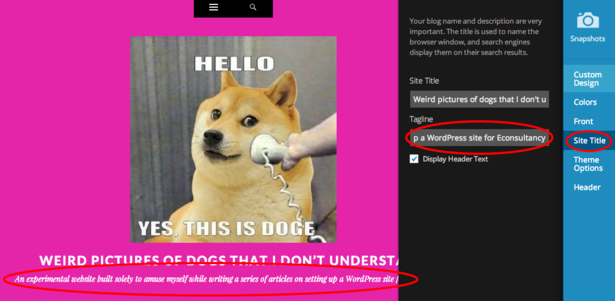
Here I’ve changed the tagline from the default ‘Smile!! You’re on the best WordPress site ever!’ to something a little less ubiquitous and lighter on the exclamation marks.
Responsive design
If you’re wondering what the tab floating in the bottom middle of the screen featuring the three monitors is for, it’s to check the ‘responsiveness’ of the site (how well it resizes to fit multiple size screens).
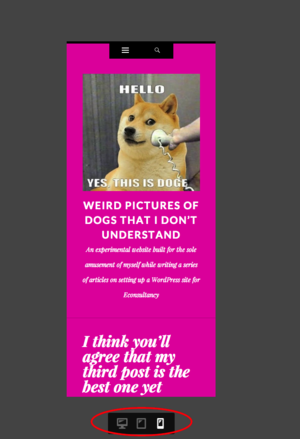
If you’re using the Ryu template, then this is perfectly responsive. The tab just gives you a quick way to change between desktop, tablet and mobile views.
Save
Finally (this may seem terribly obvious) don’t forget to regularly save any changes you make. There’s nothing more frustrating then clicking away from the site and losing your work. The save button is found at the bottom of the right-hand menu if you hadn’t spotted it yet.

Custom Design
WordPress.com provides you with the option to upgrade to its ‘Custom Design’ tools at a cost of $30.
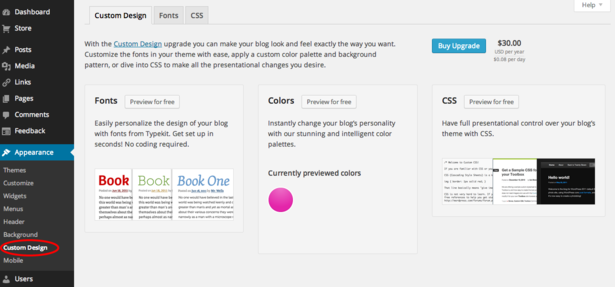
If you choose to go down this route you will have access to all kinds of extra bits of customisation.Â
There’s much wider choice of typefaces and fonts that can be applied to any area of your site. Â

Choose from a massive selection of extra colours, palettes and background images to add a little extra flare.
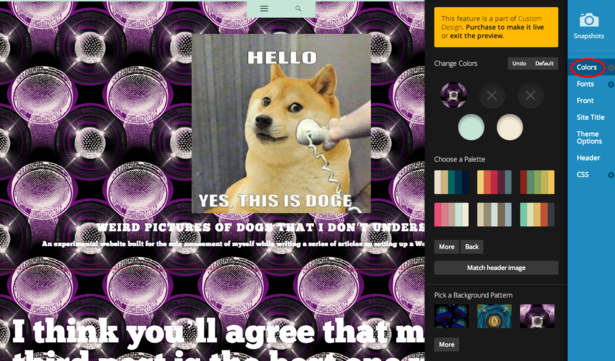
These are really easy to customise too. Just click on the corresponding circle that applies to a particular area of your site (text, background, navigation etc) then click on a colour of your choice to alter it.
Most excitingly of all, you can write you own code and alter the site in an endless number of ways with access to a cascading style sheet (CSS).

If you have never used CSS before, or have never even heard of it. Don’t worry, I was exactly the same as you a couple of years ago. Don’t be afraid of it, it’s really easy to get to grips with and there are some really useful resources out there to take you through it step-by-step, in particular Code Academy.
If you’re not sure if the custom design toolkit is right for you, you can play around with it as much as you like and see the effects on your site, without actually changing anything on the live site. You just won’t be able to save the changes until you purchase the kit though.
Throughout this article, I’ve used the same template as an example for guidance on customisation. There are many other templates available to WordPress.com users, all of which can be customised in the ways described above and in the next chapter I’ll be recommending the best out-of-the-box templates available.
If you’re a bit further down the line than as described above, check out our seven useful Google tips for bloggers and 11 excellent responsive templates for those bloggers who already use WordPress.org.
Article source: http://econsultancy.com/blog/64400-a-blogger-s-guide-to-setting-up-a-wordpress-site-customising-your-template