
Learn how to create a blog post using WordPress on our website.
Welcome to ITWorld Canada’s blogging community and thanks for taking the time to learn how to post your articles using WordPress. Creating a good post with thoughtful layout, meta data, and a snappy headline is just as important to appealing to readers as actually writing your blog.
Here is a step-by-step description of how to create a new post using WordPress.
1. Login to http://www.itworldcanada.com/wp-admin/ with the username and password you’ve been provided.
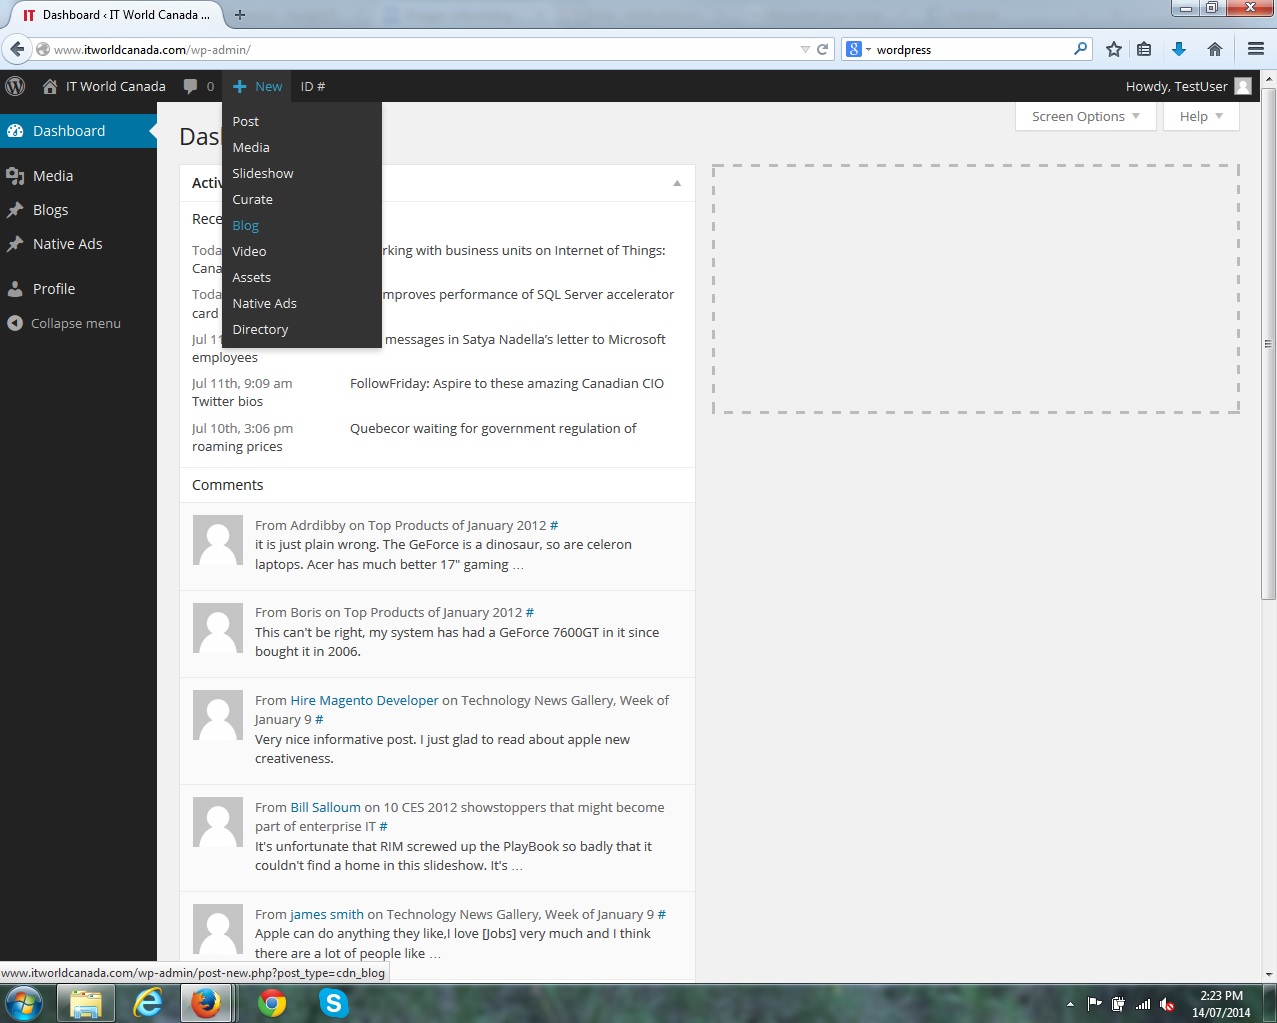
2. Click on “New†at the top navigation bar and select “Blog.†You won’t be able to input the other types.
3. Write your post or paste in text from your word processing file to the big content window. If you are pasting in text, it’s best to do that using the “Text†mode for the editor, as opposed to the “Visual†mode, which can be found on the upper right-hand corner of the content window. The Visual mode can be used instead to organize your layout and text formatting. Try using bullet points to highlight lists, and sub-headings to segment out your sections.
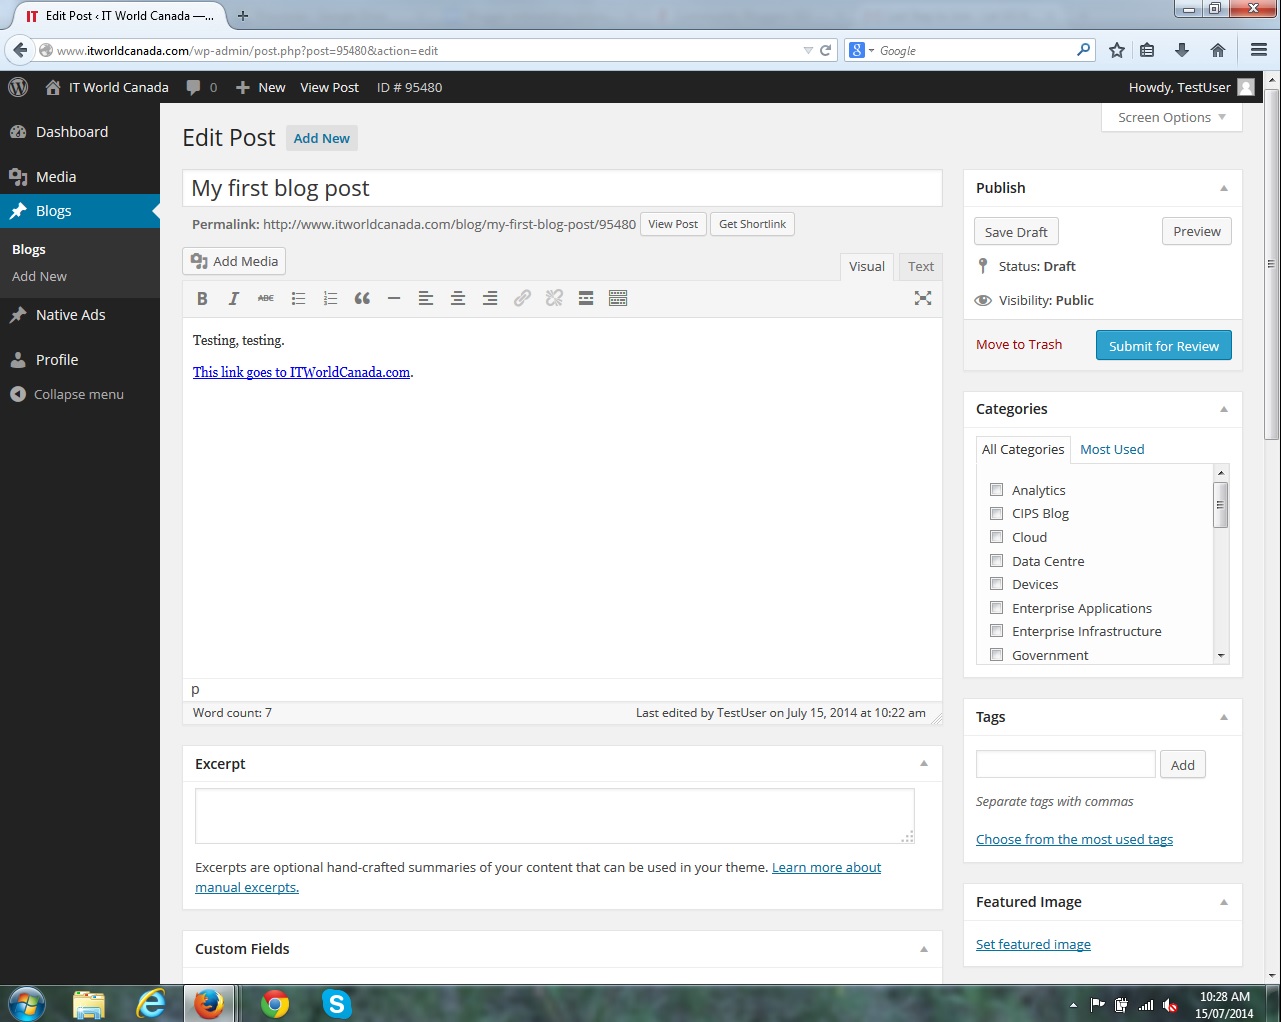
4. Add links to your text by highlighting the text you’d like to hyper-link and clicking the chain icon. Paste in your link (or type it in) and click the “open in new tab or window†box.
5. Add your featured image. These must be cropped to exactly 620 pixels wide by 250 pixels tall. You should see the “Feature Image†box in the right-hand vertical column of your WordPress dashboard. Click “Set featured image†and then upload your image. Enter the source of the image in the caption area. You can also search our existing images if you don’t have your own featured image.

Â
6. Tag the categories that apply to your story. Choose just one or two under the “Categories†box. Don’t use the “Post†tag, it’s just the default.
7. Type in some key words to describe your article. Think about what people would search for in Google to find your post. If you type slowly, some suggestions will come up to help you. You can also click “Choose from the most used tags†for some ideas.
8. Submit your post for review by clicking the big blue button. An editor will come soon to review your post and schedule it for publication!
9. Click “Preview†to see what your post will look like when it’s live. You can still click on “Edit†along the top navigation bar to make changes, then click the blue “Update†button to save those changes. You can even edit your post after it’s published.
Next, learn how to edit your post after you’ve already saved a draft or set it for publication. Also, learn how to add rich media types to your post to really make it engaging.
Article source: http://www.itworldcanada.com/blog/blogging-101-how-to-create-a-blog-post-on-wordpress/95441