
If your website was built using WordPress, one of the best things you can do for your small business is to learn how to install a WordPress plugin.
While that may sound like hyperbole, consider this: WordPress plugins, the majority of which are free, extend and expand the functionality of your website up to and including the ability to automate and manage your business — from online marketing to lead capture and from sales to delivery — faster and more consistently than you do today.
How many more clients or customers could your business add and serve using that extra time?
That’s the power of WordPress plugins.
There are currently more than 36,375 plugins available at wordpress.org. That’s a lot. But don’t let the sheer number of plugins scare you away, because we’re going to show you how to pick a good plugin out of that pile. Then we’re going to show you how to install a WordPress plugin you chose on your own site so you can start reaping the benefits of the plugin’s added functionality to manage your business.
Good to Know Before Moving On
Hosted vs. Non-Hosted
Of course, WordPress comes in two flavors: hosted and self-hosted.
When you create your WordPress site over at wordpress.com, you’re using the hosted option. While not as customizable as the self-hosted option, it’s the perfect platform if you want to get up and running quickly. Unfortunately, your choice of plugins is much more limited when your site is hosted and that curtails the benefits you can realize from using plugins.
If you create your WordPress website over at one of the many available hosting companies, you’re using the self-hosted option. Infinitely customizable, self-hosted WordPress sites can use any of the 36,375 plugins available over at wordpress.org and that’s a good thing.
Two Key Factors to Consider Before Selecting a WordPress Plugin to Install
Because of feature enhancements and bug fixes, WordPress’ code is updated on a fairly regular basis. After each update, there’s always a chance that a plugin that worked with the older version of WordPress may not work with the new one.
To make a particular plugin work with the latest version of WordPress, it needs to be updated as well and therein lies the problem. Since most plugin developers offer their work for free, they sometimes drop the project somewhere along the way and the plugin stops getting updated.
These plugins are “dead†and if a plugin you are using dies, you’ll need to search for a replacement.
To minimize the chance that you’ll face this headache, you should always pay attention to these two factors when selecting a plugin to install:
When Was the Plugin Last Updated?
A plugin that gets updated often is a plugin that is less likely to die.
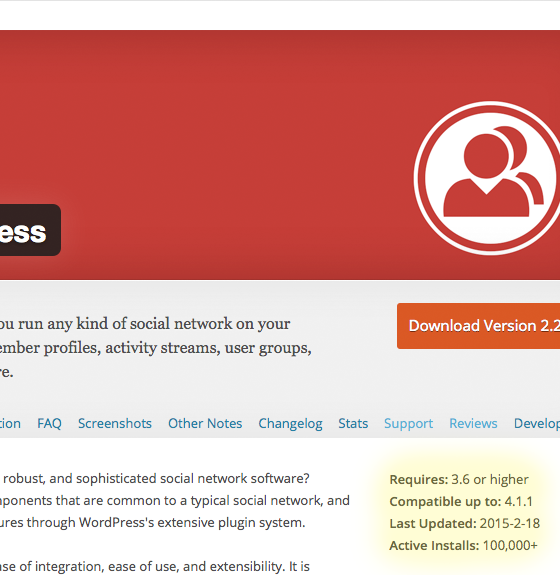
To figure out if your plugin has been updated to the latest version of WordPress, first visit the plugin’s page on wordpress.org and look underneath the header on the right. There you’ll see up to which version the plugin is compatible (in the image below, that’s version 4.1.1).
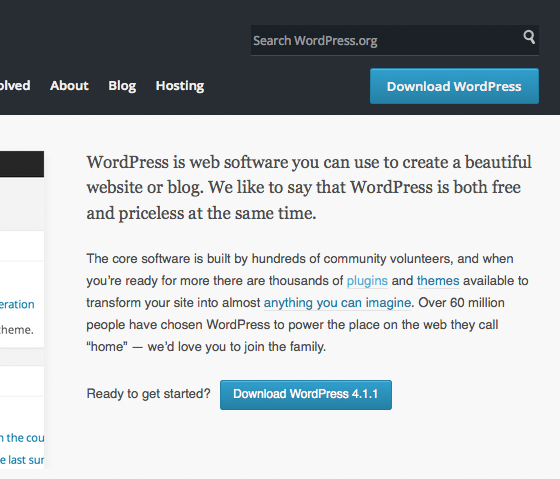
Next, head on over to the front page of wordpress.org and look at the lower of the blue download buttons on the right. As you can see, WordPress version 4.1.1 is the latest WordPress update, so the plugin above is A-OK.
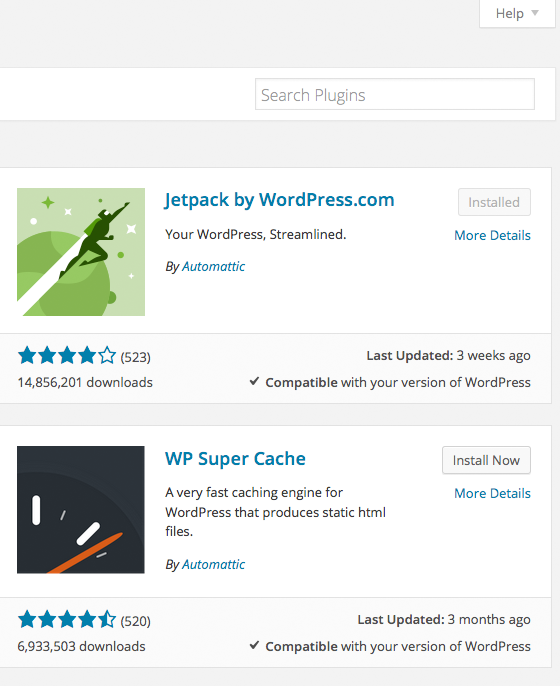
Another way to check this is to search for a plugin using your WordPress dashboard (more on how to run that search in just a bit).
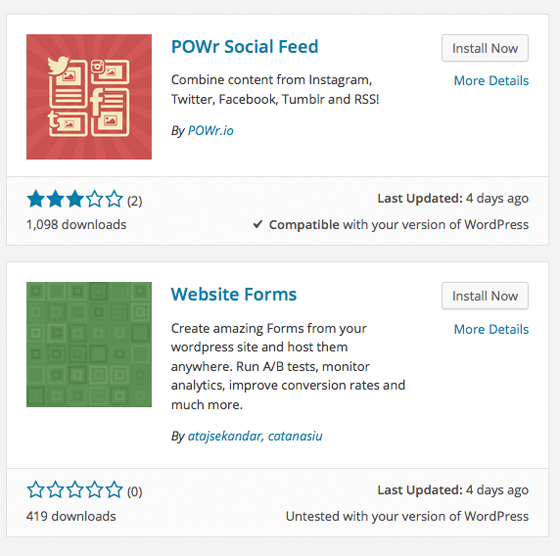
As you can see in the search results below, one of the plugins was tested and declared “Compatible†and one was not. Always try to select plugins that are tested and compatible as that means they’re up to date (assuming of course that you keep your WordPress version up to date which you should).
One other thing to beware of is when the “Last Updated†date is more than a year old (and many, many of them are). If that’s the case, it’s likely that the plugin is dead.
Do the Developers Provide Timely Support?
Since most plugins are free, there’s not a lot of incentive for a developer to provide support. They need to have the passion to continue supporting their work and the drive to see it through.
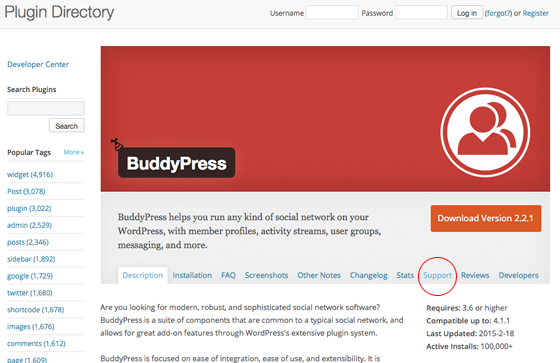
As this is the case, you should always check on the level of attention a developer devotes to support before selecting their plugin. To do so, visit the plugin’s page on wordpress.org and click on the “Support†tab as shown below:
Once you’re at the support discussion forum for that plugin (as shown below), look around to see what you can find. Does the developer respond in a timely manner or do questions languish for weeks? Do they provide service with a smile or are they snippy and rude?
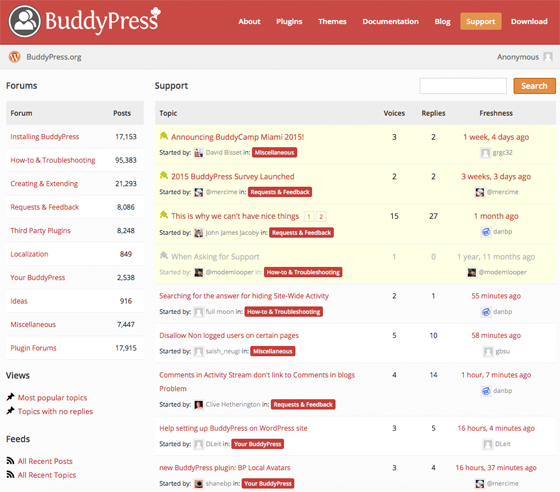
Bad service is a strong sign that the plugin may be dying.
How to Install a WordPress Plugin
There are two ways to install a WordPress plugin using the WordPress dashboard:
- Search for a plugin and install the one you want to use, and
- Upload a .zip file containing the plugin and install its once it’s ready.
Search for a Plugin and Install the One You Want to Use
Here are the steps to follow:
- Login to your WordPress dashboard and click “Plugins†in the left column:
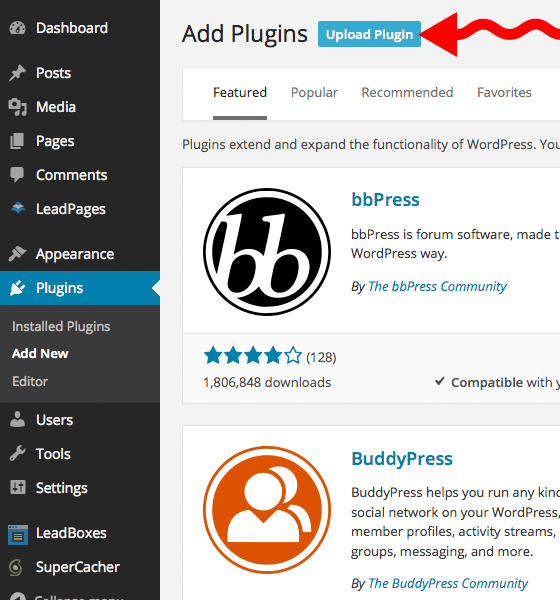
- Click on “Add New†under “Plugins in the left column to be taken to the, “Add Plugins†screen:

Here, you can begin your search for plugins using the first of three methods. Using the links at the top, you can look for “Featuredâ€, “Popularâ€, Recommended†and “Favorites†plugins. This is the best way to search if you want to explore what’s out there for you to use for your own site.
- If you know the name of a plugin you want or some keywords for what the type of plugin you want does (e.g. social sharing, image slider), the second way to search is the search field on the top right of the “Add Plugins†screen:
This image also shows the, “More Details†link that we’ll talk about in step 5.
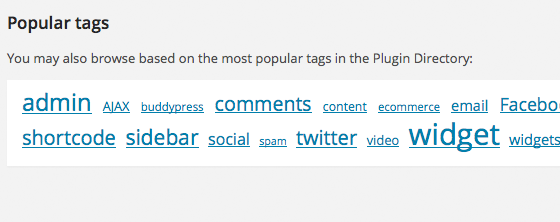
- The third and final way to search for a plugin is to use the tags at the bottom of the “Add Plugins†screen. This method combines the exploring of the first search method with the refinement of the second search method:
- When you want to take a closer look at a plugin, click the “More Details†link (as shown in the image under step 3 above) and you’ll get this pop-up details screen:
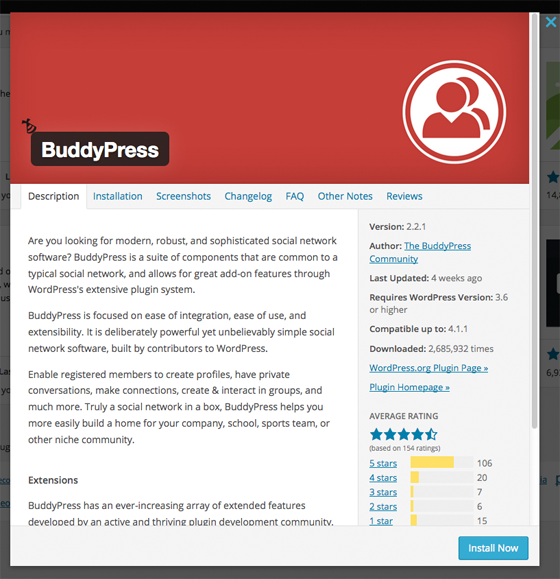
Note the tabs along the top (under the red image). Here’s where you can learn all about the plugin as well as see screenshots of the plugin in action.
If you’re ready to install this plugin, click the blue “Install Now†button on the bottom left of the details screen.
- Once the install is complete, you’ll see the following screen:

It is possible to install a plugin without activating it (e.g. you install a new plugin but want to minimize the impact if something goes wrong when you activate it so you don’t activate it until the weekend when your website traffic is lower), which is why you see the choice to activate the plugin above. Let’s say we’re ready to forge ahead and click the, “Activate Plugin†link.
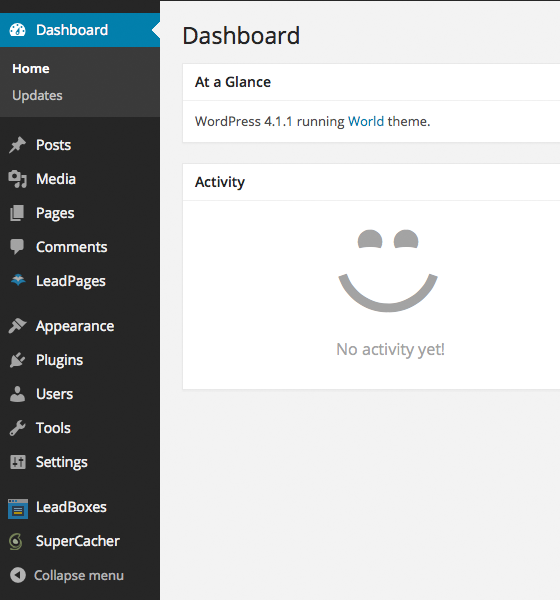
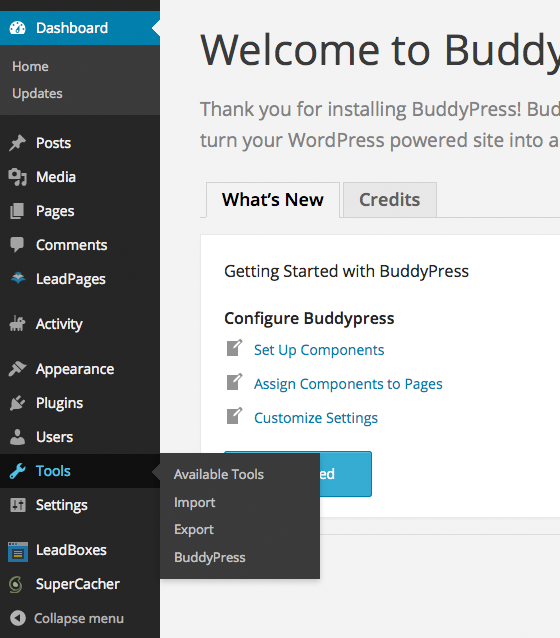
- And your plugin is installed! Congrats! To start using your plugin, look for it’s menu link in one of three places:
- The left column,
- Under the “Plugins†menu, or
- Under the “Tools†menu as shown in this example:
Upload a Zip File Containing the Plugin and Install its Once it’s Ready
Often, a WordPress plugin will have a free version with basic functionality and a premium version with expanded features.
When you purchase a premium plugin, you typically receive a .zip file containing the plugin. Use this approach to install your new plugin:
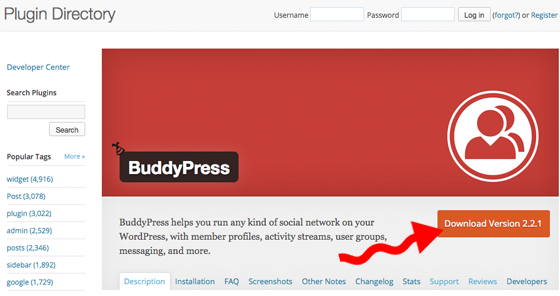
- Download the plugin according to the developer’s instructions. You can also download any of the free plugins on wordpress.org if you want to use this install method as opposed to the one above. In that case, each plugin has a button like the one shown below:
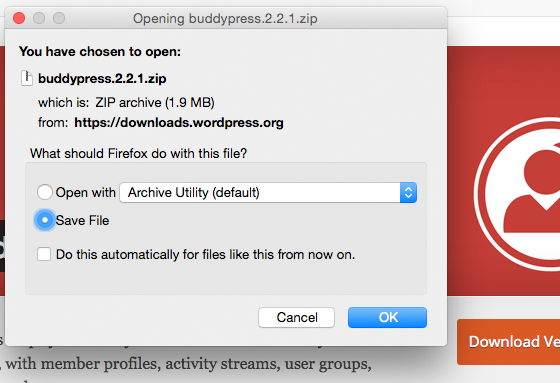
- Once you click the download button, you’ll see a pop-up like this:
Choose to save the file and then click, “OKâ€:
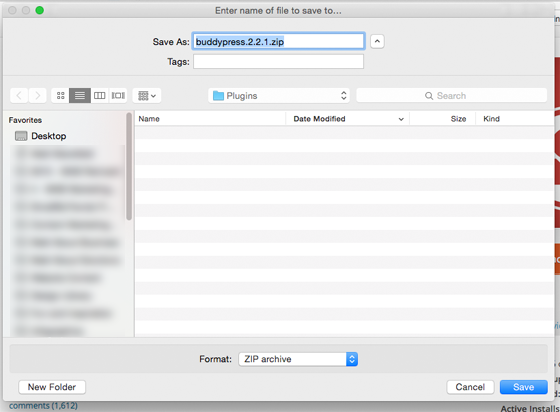
- Next you’ll need to tell your browser where you want the file saved to. Make sure you select a spot that you’ll remember.
Note: if you don’t see a screen like the one below, your file was saved to you “Downloads†directory automatically so look for it there.
- Now that you have the plugin .zip file downloaded, it’s time to upload it to your site using the WordPress dashboard.
Head on over to the “Add Plugins†screen and click the “Upload Plugin†button as shown below:
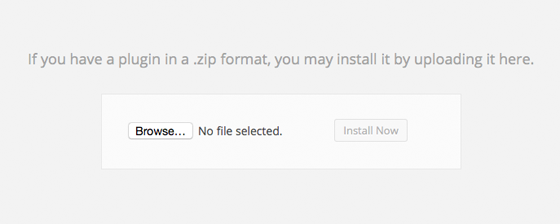
- On the next screen, click the “Browse†button:
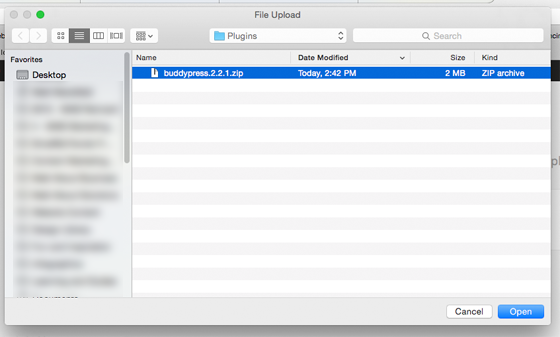
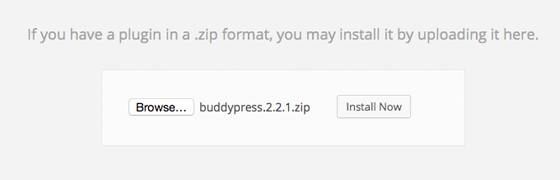
- Then, in the window that pops up, find the plugin’s .zip file, click on it and then click the “Open†button:
- Now that you’ve told WordPress which file to upload, click the “Install Now†button to begin:
- And finally, we’re back at this screen. Head on back to the, “Search for a Plugin and Install the One You Want to Use†section and pick up from step 6 to finish up. Congrats! You’ve installed a WordPress plugin for your site.
Image: WordPress.org
Article source: http://smallbiztrends.com/2015/03/how-to-install-a-wordpress-plugin.html