
You’ve just hit publish on your shiny new blog post. It’s packed with information that you know your readers will love. Wouldn’t it be even better if you could click one button and share your new post with your entire online network?
With Jetpack’s Publicize feature, you can instantly share posts on social media networks. So, if you’re one of the millions of WordPress users taking advantage of Jetpack’s functionality, you can use the Publicize feature immediately. You only have to set up your accounts once, and then you can start sharing right away.
There are 4 simple steps to activating Publicize in Jetpack:
- In your Dashboard, navigate to Settings and then Sharing.
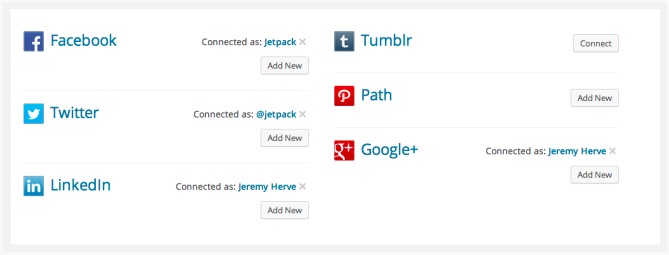
- Select the social media network you want to connect.
- Grant WordPress access to your network.
- You’re connected!
After you connect an account, you’ll see a popup that asks you if you want to make the connection available to all users of your blog. If you’re working with a team and you need them to have access to social sharing, then check this box. Otherwise, leave it unchecked.
Now that you’ve activated Publicize, when you publish a post, it will automatically be shared on the social media networks you’ve connected.
To test this out, make a new post that you want to share. In the Publish box on the right-hand side, you’ll see “Publicize†at the bottom of that box. It will then list your networks. When you publish this new post, it will also be shared on those networks.
You can also make some nifty changes in that same Publish box. Underneath the word “Publicize,†you’ll see the option to Edit Details. If you click on this, you can set custom messages for each social media network. So if you want to create different messages for different networks, you can easily do so here.
After you’re done modifying everything, hit Publish, and you’re live! Your content is now visible on your blog as well as your selected social media networks.
But that’s not all Publicize can do. Head over to the Sharing Settings page (Settings Sharing). The Sharing Buttons section allows you to display social sharing buttons on your site so readers can share your posts with their networks. You can choose the button type, the sharing label, and the pages that will display buttons. It also gives you a live preview to see your changes in real time.
Conclusion
Publicize has some powerful features that are built into the already powerful Jetpack. If you’re already using Jetpack, the Publicize tool is a no-brainer. It will help you get more eyes on your content, and you can set it up in a matter of minutes.
If you’re interested in learning more about Jetpack, check out A Guide to Jetpack by Jacco Blankenspoor and 5 Things You May Not Know about Jetpack for WordPress by Doyin Faith Kasumu.